

Power your counter board
Your counter board needs power to operate.
You will need to connect the ground from the bottom header to the pin that says GND. As best practice, use a black wire for the GND.
Then connect the positive (5V) from the right header below the board to the header on the board that says 5V.
Once you have these two wires connected and your Arduino connected to the computer, you should see the green LED light up. If the LED lights up red instead of green, your wiring is wrong! Check and redo it.
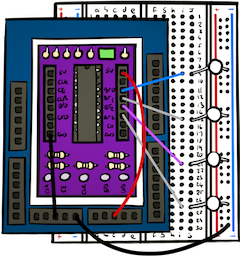
Add the 4 bit LEDs
Now it's time to add 4 LEDs using your larger breadboard. To reduce the number of wires needed, we are going to use a common ground line (the blue line on the breadboard). Connect a wire from the GND on your Arduino to the blue line on your breadboard.
Now add 4 LEDs, each with their short lead into the blue row (ground).
Then connect each LED anode to one of the bit on the counter. As the counter starts to count, these 4 LEDs will represent the value in binary.